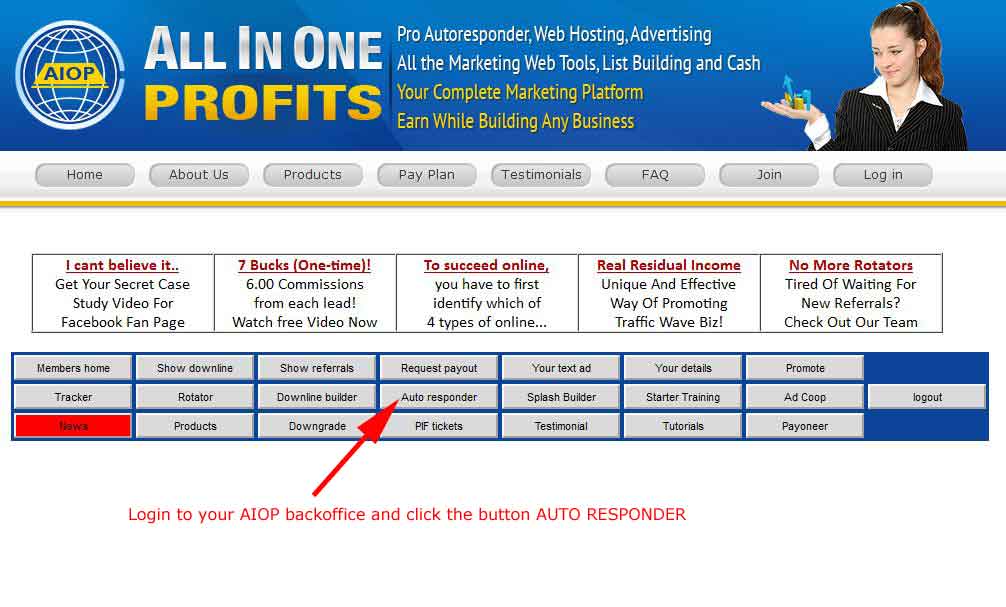
1. Please open a new tab in your browser and login to your AIOP backoffice.
Then click the button AUTO RESPONDER.
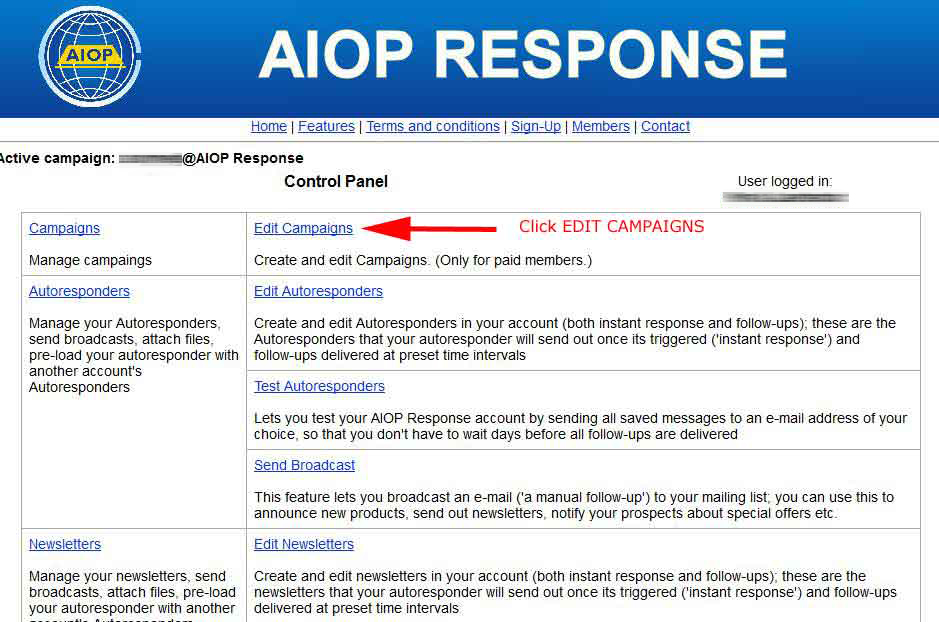
2. Click EDIT CAMPAIGNS.
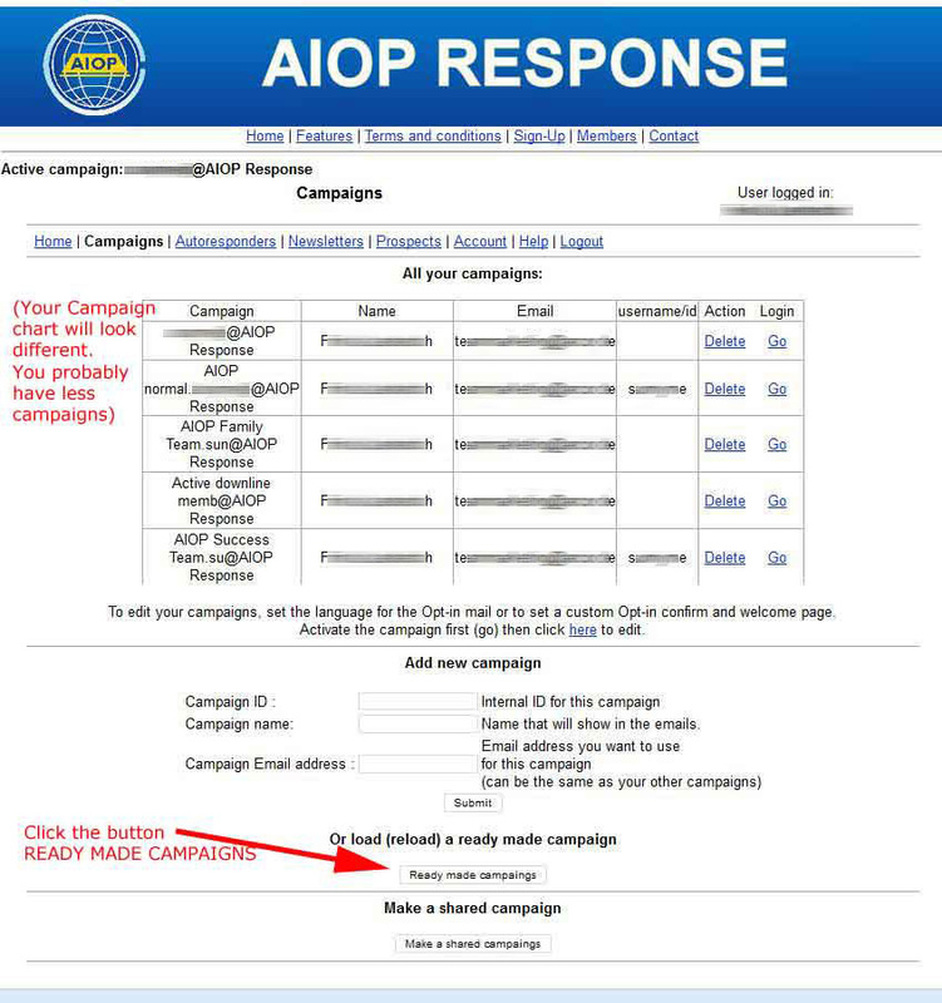
3. Now you can see a chart containing your campaigns. If you haven't loaded or created a campaign yet, you will probably see only one campaign in the chart.
Scroll down and click the button READY MADE CAMPAIGNS.
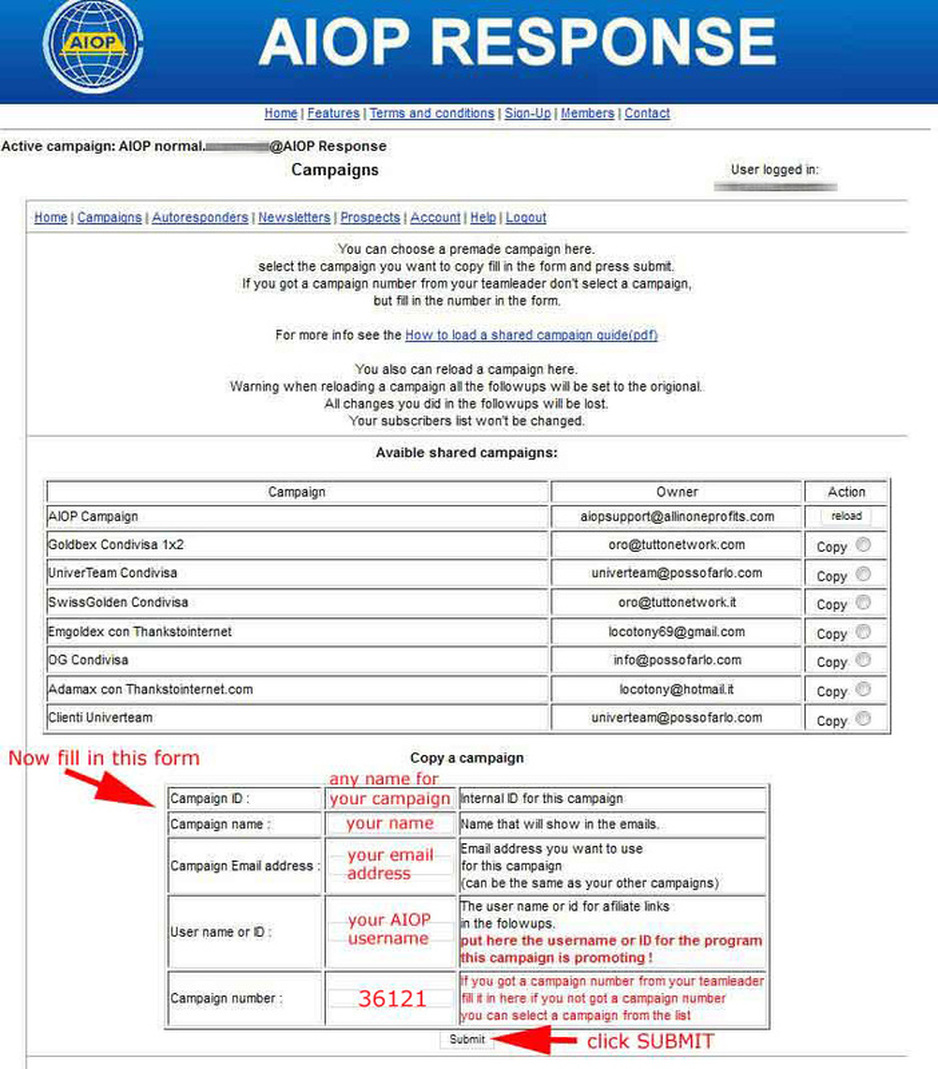
4. Now you need to fill in the COPY A CAMPAIGN form.
- Campaign ID = Any name of your choice for your campaign
- Campaign Name = Your name (will be shown in autoresponder messages)
- Campaign Email address = Your email address (will be shown in autoresponder messages)
- User name or ID = Your AIOP username (login name)
- Campaign number = It has to be 36121
Then click the button SUBMIT.
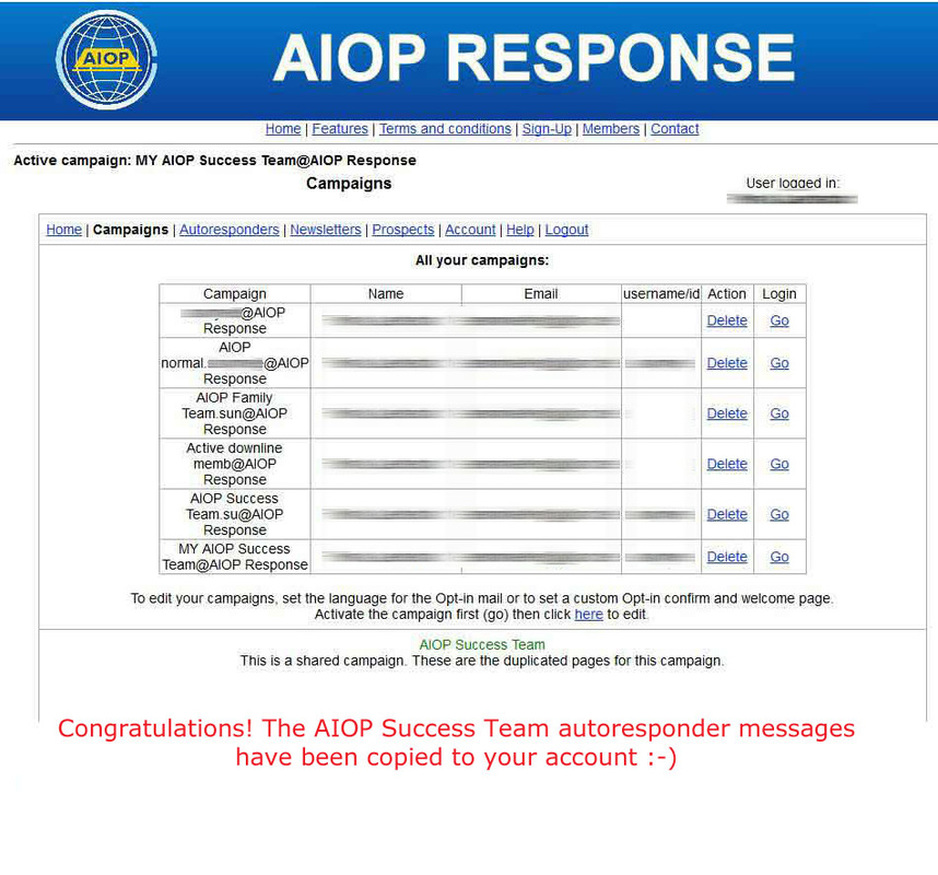
5. In your campaign chart you will now see the campaign you just created. Click on GO next to the campaign.

Congratulations! The AIOP Success Team auto responder messages
have been copied to your account. But we're not finished yet ;-)
Now you need a lead capture page which is connected to the auto responder messages you just copied to your account. So when someone opts in at your page they will automatically receive your auto responder/follow up messages containing your personal referral link. When they sign up with AIOP from your referral link you will get paid.
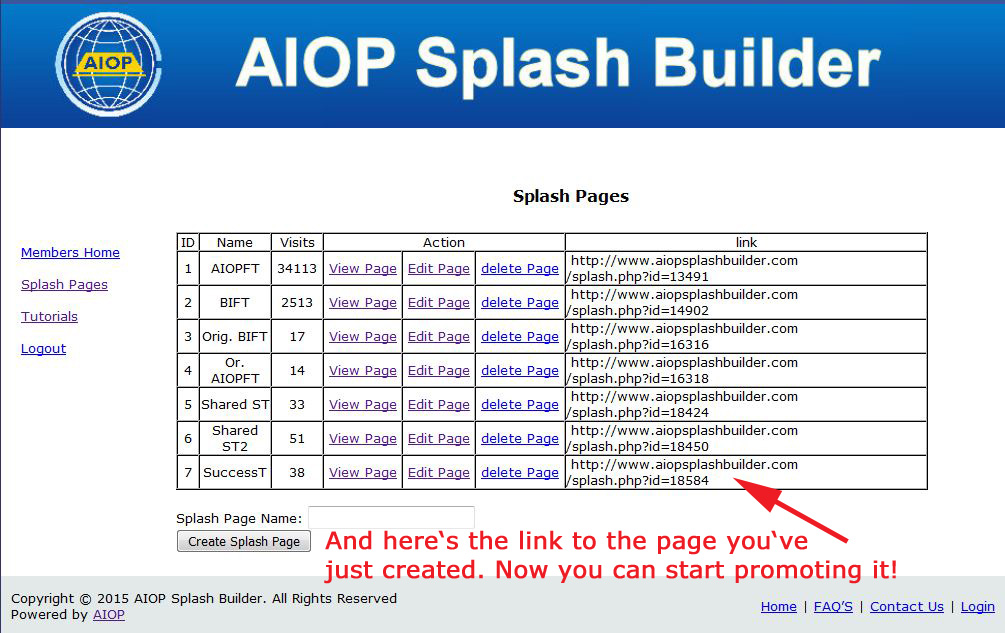
I created the below capture page which we will now copy to your account. You can change the text or the pictures later if you want. No problem. Everything is customizable.

You can see the page full size here: http://aiopsplashbuilder.com/splash.php?id=18584
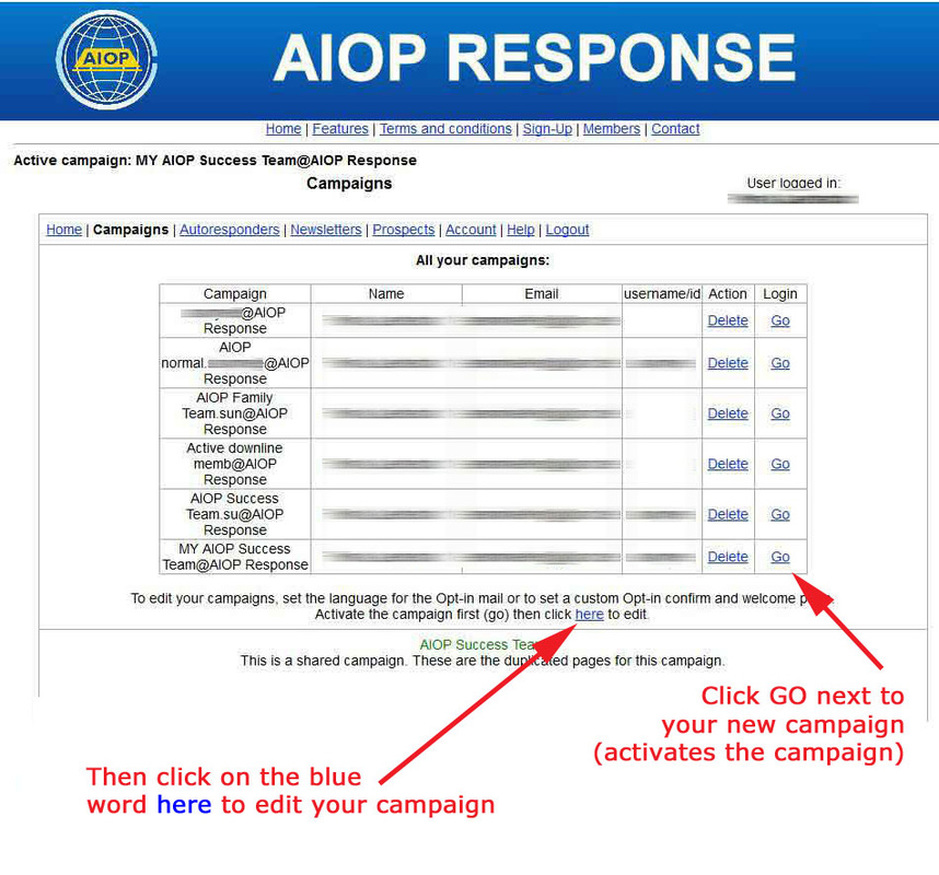
6. Ok, let's continue. You should now have the page with your campaign chart open and you have already clicked GO next to the campaign you just copied to your account (if you're not sure, click GO again). It means your new campaign is now active. Now click on the blue word "here" below the campaign chart.
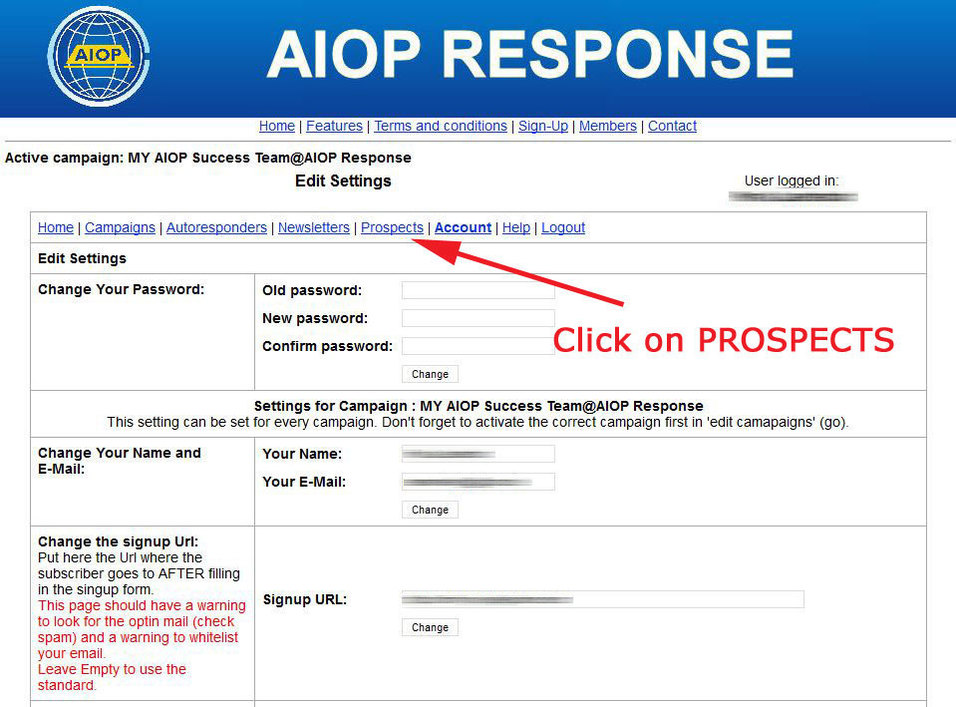
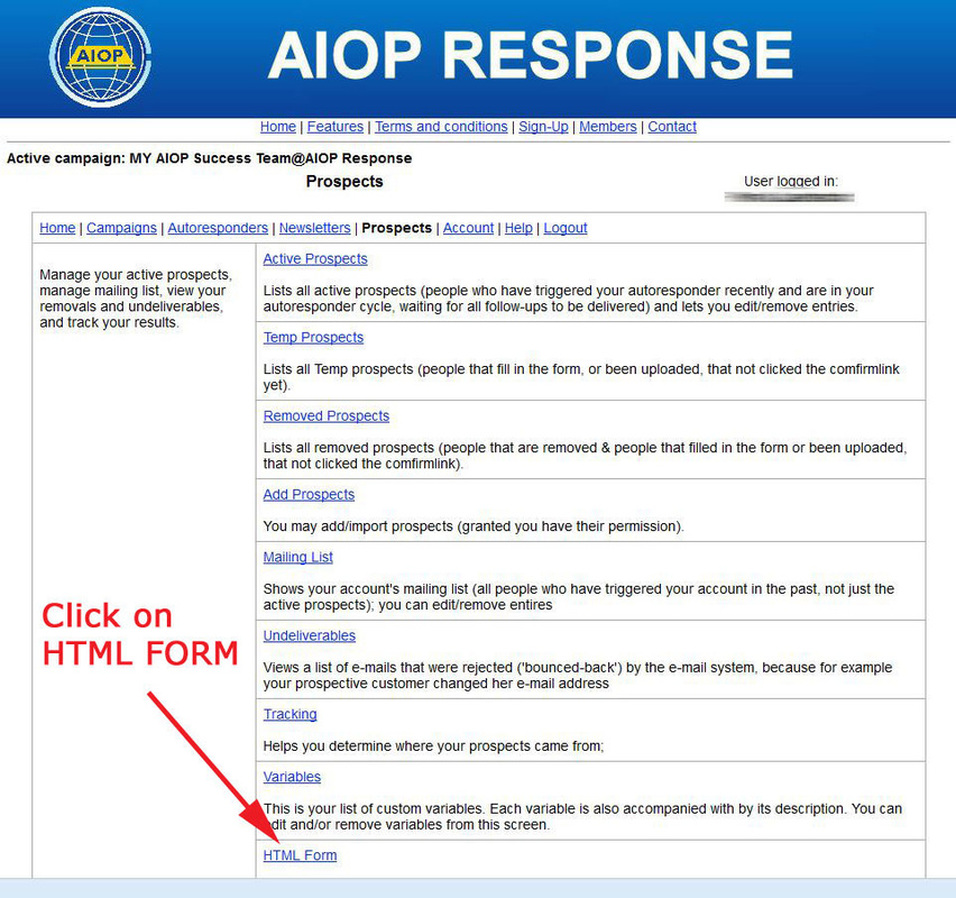
7. On the next page that opens click PROSPECTS.
8. Then click on HTML FORM.
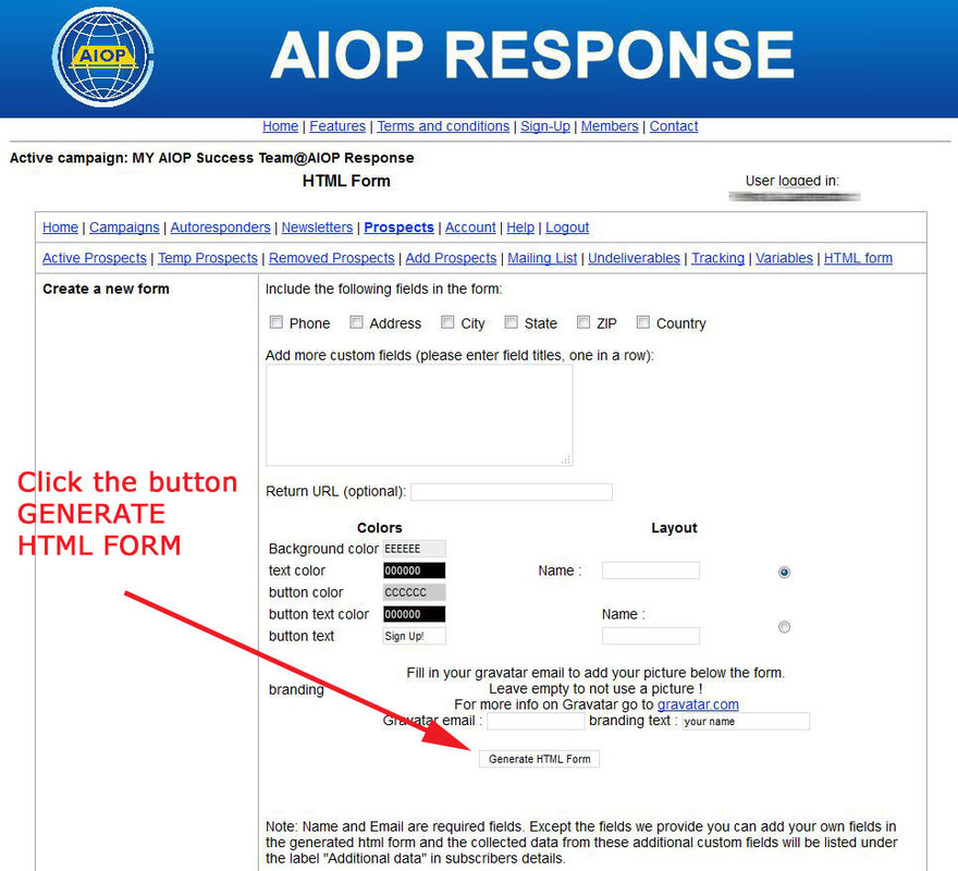
9. On the next page click the button GENERATE HTML FORM.
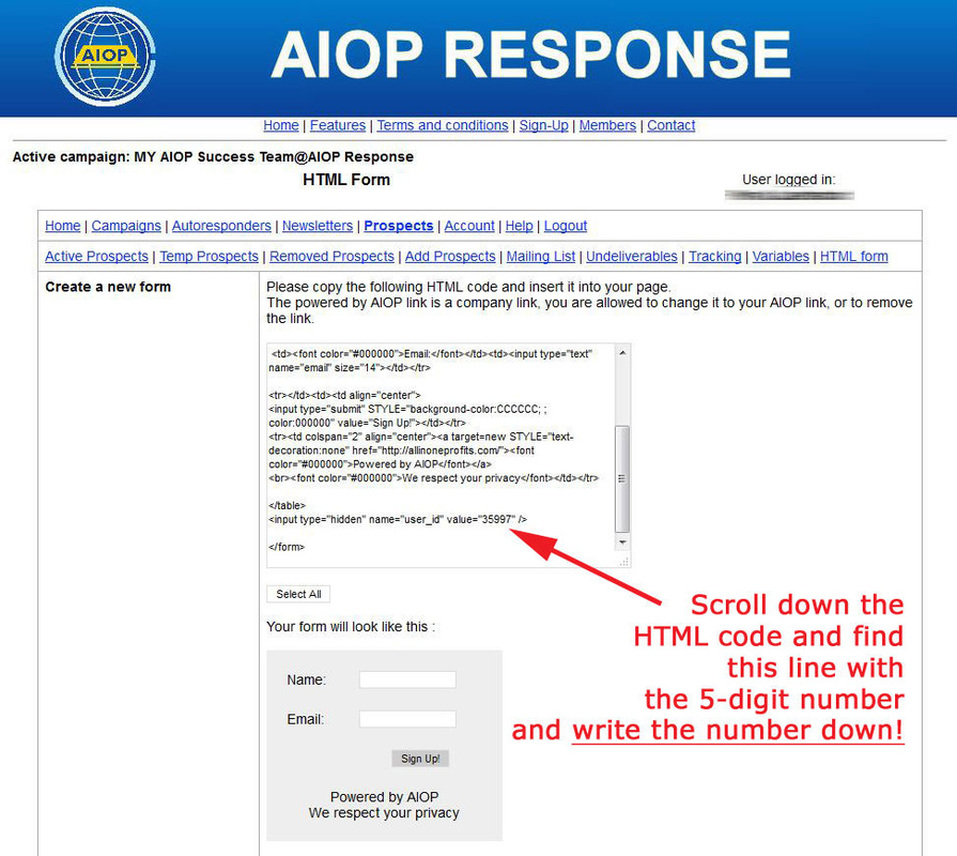
10. Now you will see an HTML code. Scroll down to the bottom of the code and find the 5-digit number. Write down that number (your number will be different to the one you see in the image below). You will need the number in one of the next steps.
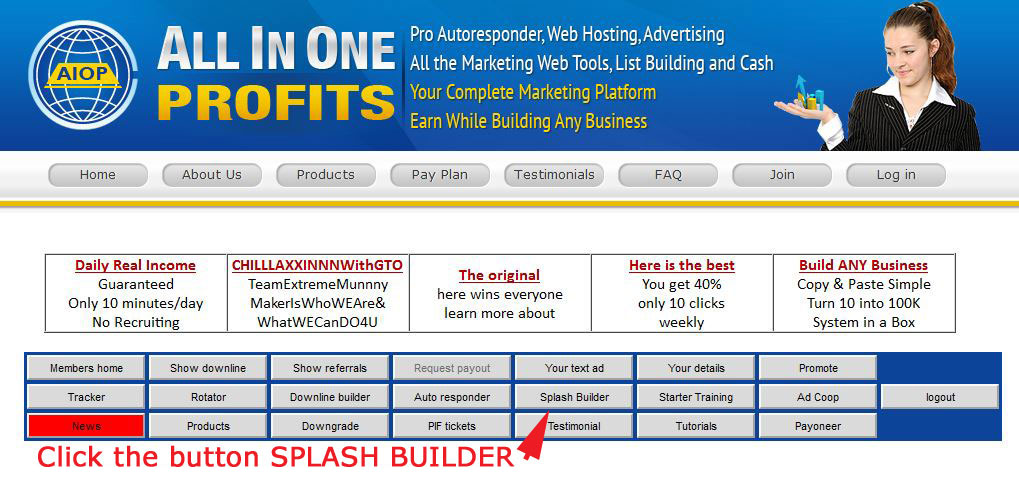
11. Now you can close this tab of your browser. The tab with the AIOP backoffice main page should still be open (if not, simply login to AIOP again). On the main page of your backoffice click SPLASH BUILDER.
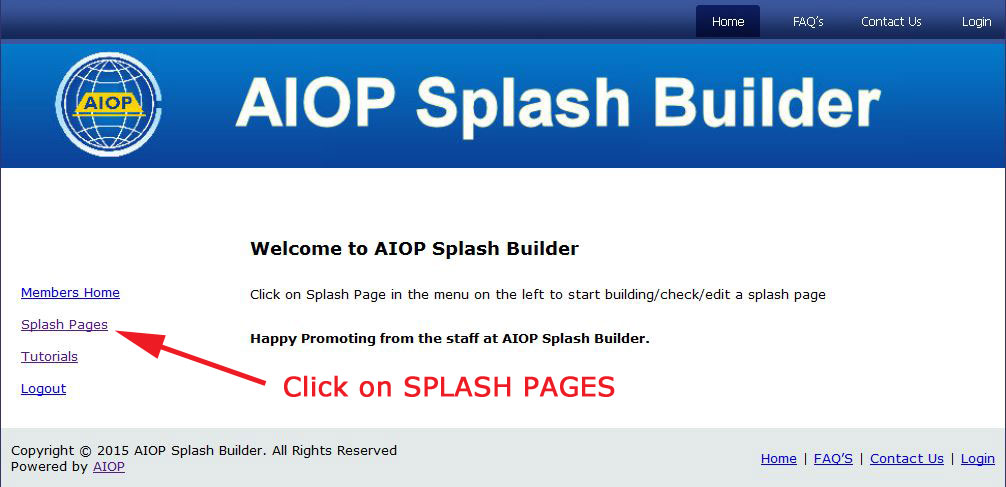
12. Click on SPLASH PAGES.
13. Now we will create your new splash page. Enter a name of your choice in the field
"Splash Page Name", then click the button CREATE SPLASH PAGE.

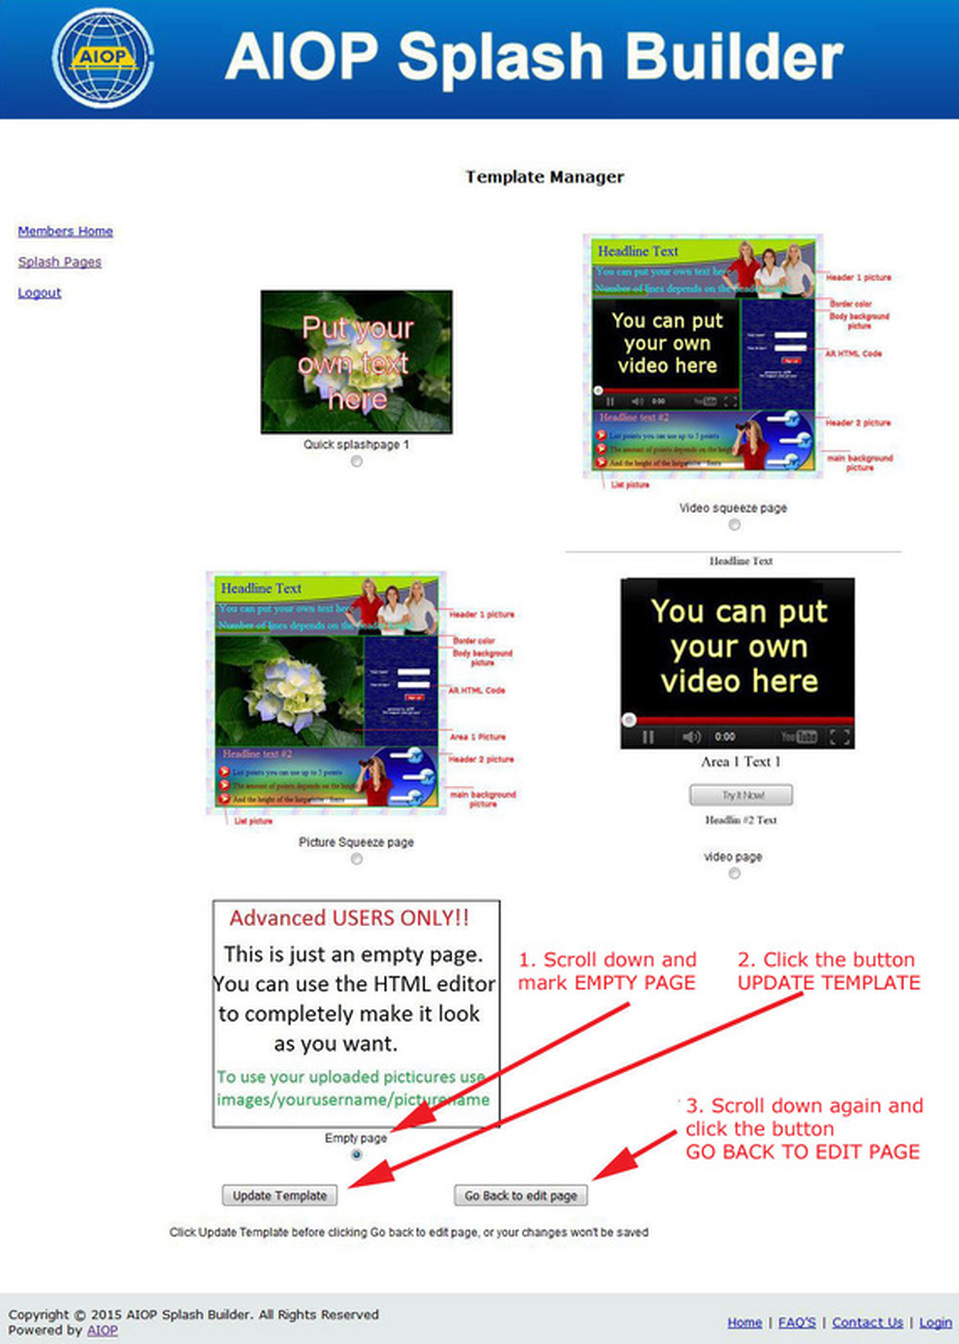
14. On the Template Manager page scroll down and mark EMPTY PAGE, then click the button UPDATE TEMPLATE. Scroll down again and click the button GO BACK TO EDIT PAGE.
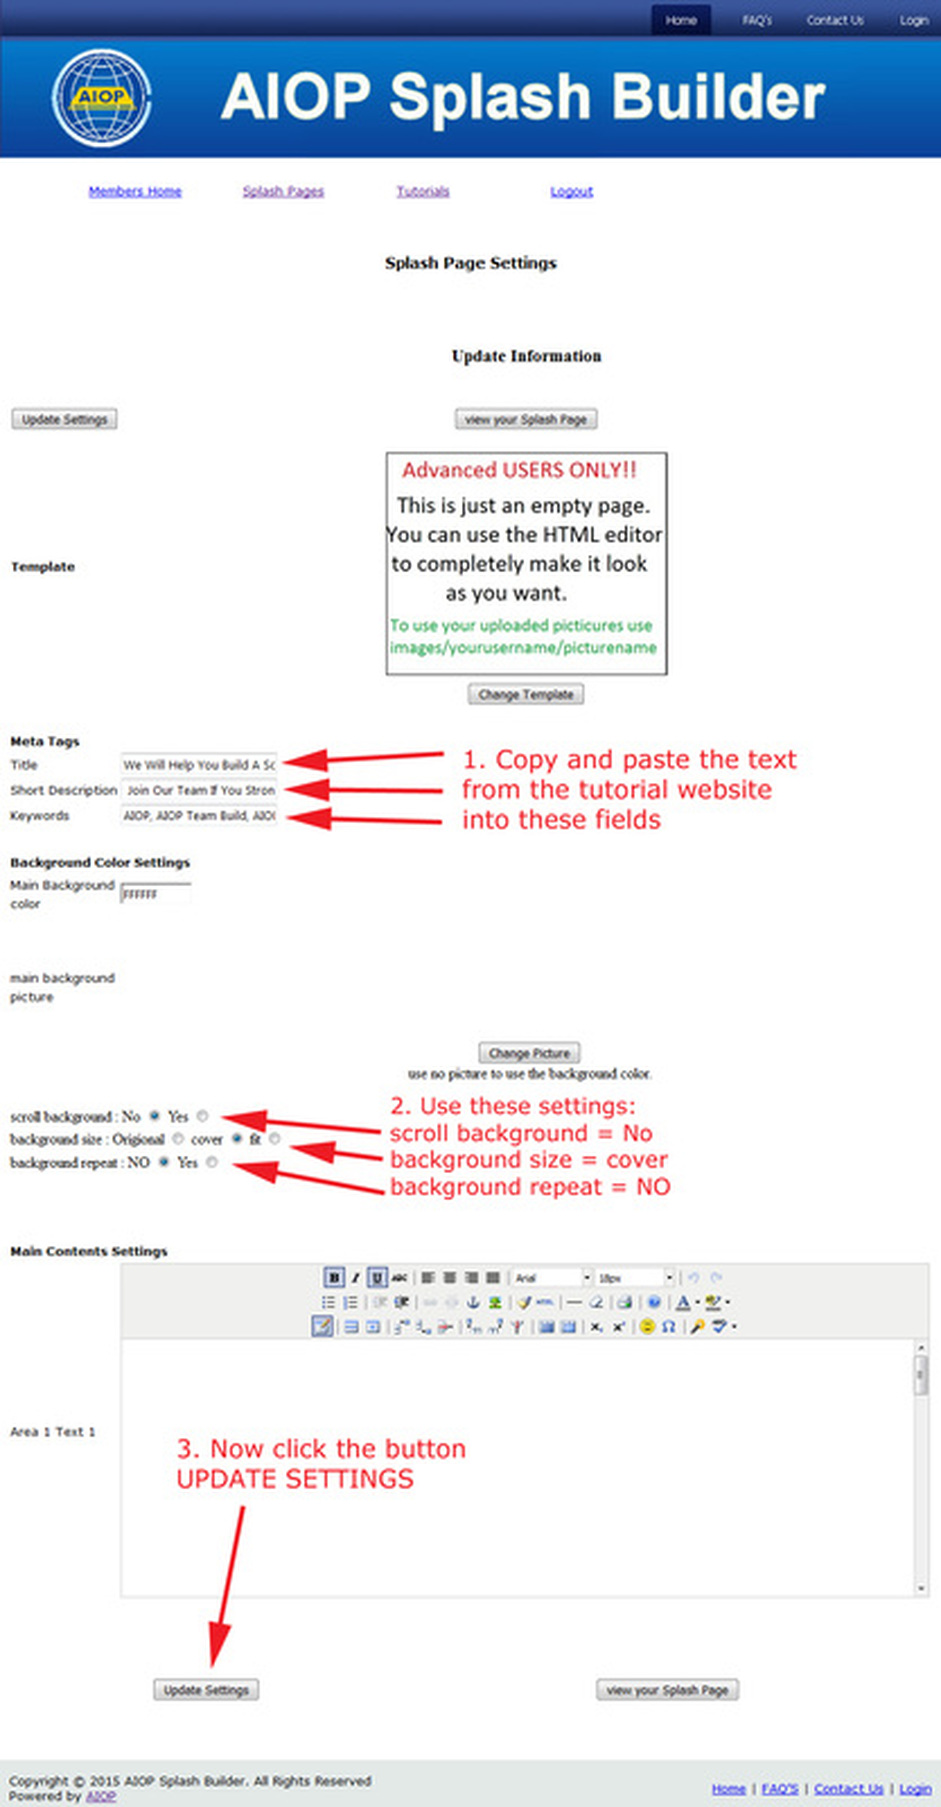
15. For the "Splash Page Settings" page just follow the instructions on the picture below.
For the "Meta Tags" section you can just copy and paste the following text:
Title:
We Will Help You Build A Solid Income!
Short Description:
Join Our Team If You Strongly Desire To Build a Solid Monthly Residual Income! We Guide You Personally... This Is Our Commitment To You!
Keywords:
AIOP, AIOP Team Build, AIOP Success Team, List Building, Make Money Online
We Will Help You Build A Solid Income!
Short Description:
Join Our Team If You Strongly Desire To Build a Solid Monthly Residual Income! We Guide You Personally... This Is Our Commitment To You!
Keywords:
AIOP, AIOP Team Build, AIOP Success Team, List Building, Make Money Online
16. The file below (aiophtml.txt) contains the HTML code for your splash page. Right-click and download it to your computer. Open the file on your computer and copy the content
(you will need it in step 18).
| aiophtml.txt |
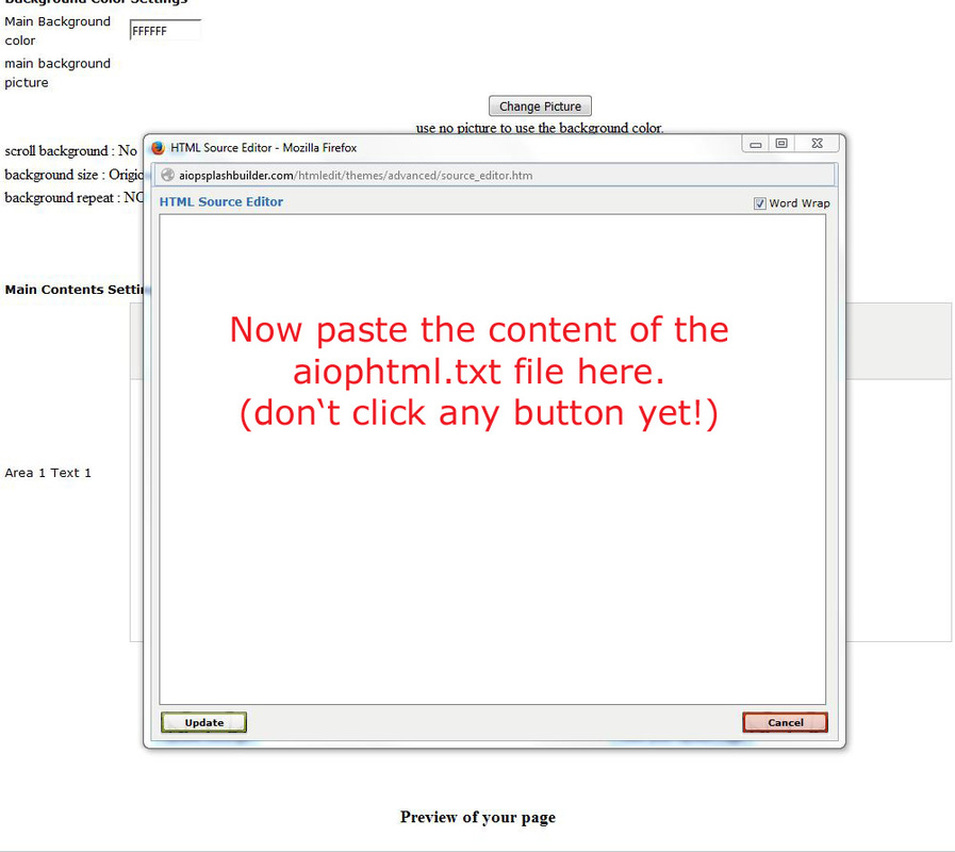
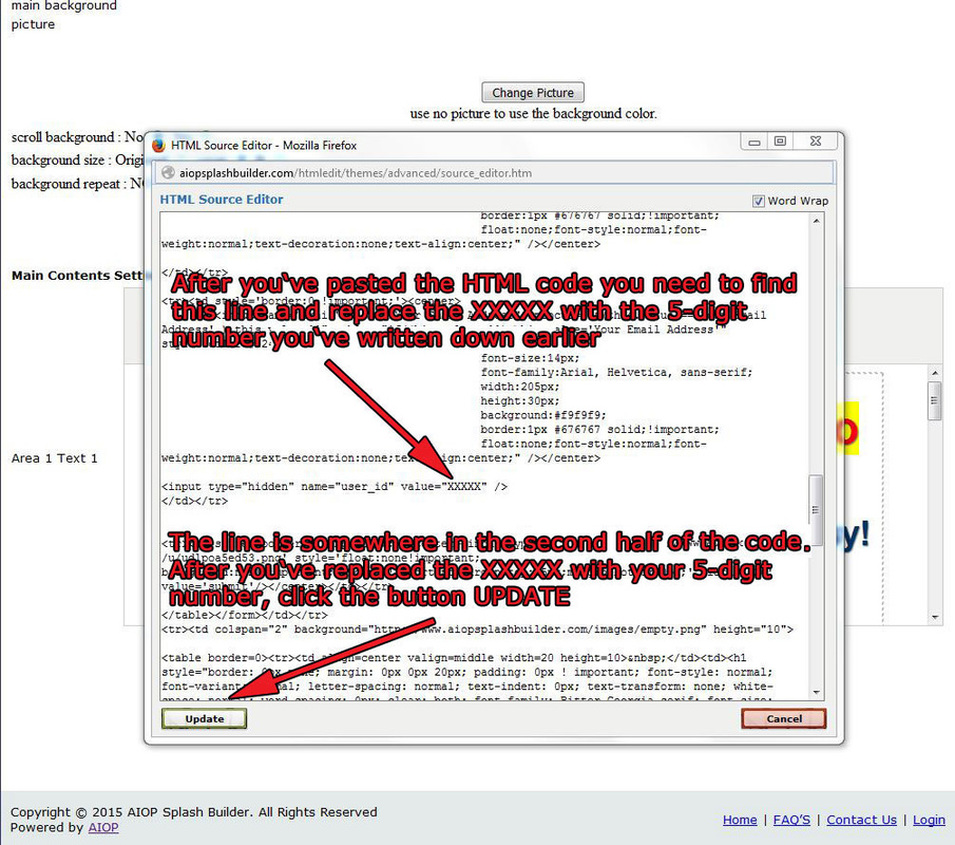
17. You are still on the Splash Page Settings page. Click on "HTML" as shown in the picture below. An HTML source editor window will pop up

18. Paste the content of the aiophtml.txt file into the HTML source editor popup window.
19. Now that you've pasted the HTML code into the editor you need to scroll down and find the line where it says: <input name="user_id" value="XXXXX" /> The line is somewhere in the second half of the code. Then you need to replace the XXXXX with the 5-digit number you've written down earlier. Then click the button UPDATE.
20. Now click the button UPDATE SETTINGS and then the button VIEW YOUR SPLASHPAGE.
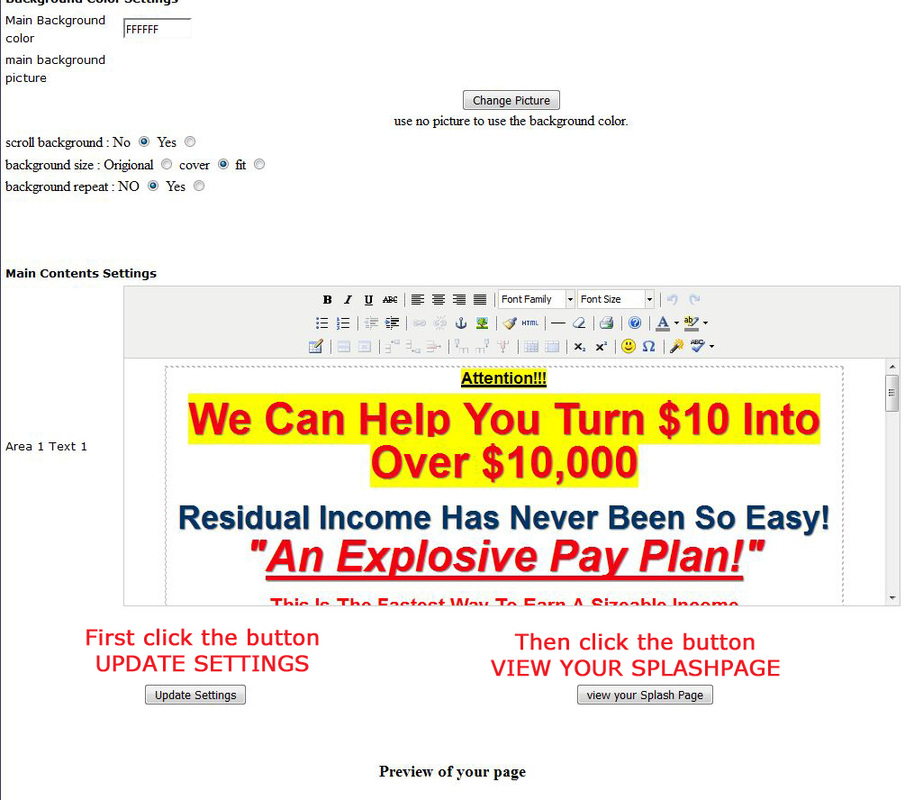
Now your splashpage will be shown and it should look like this:

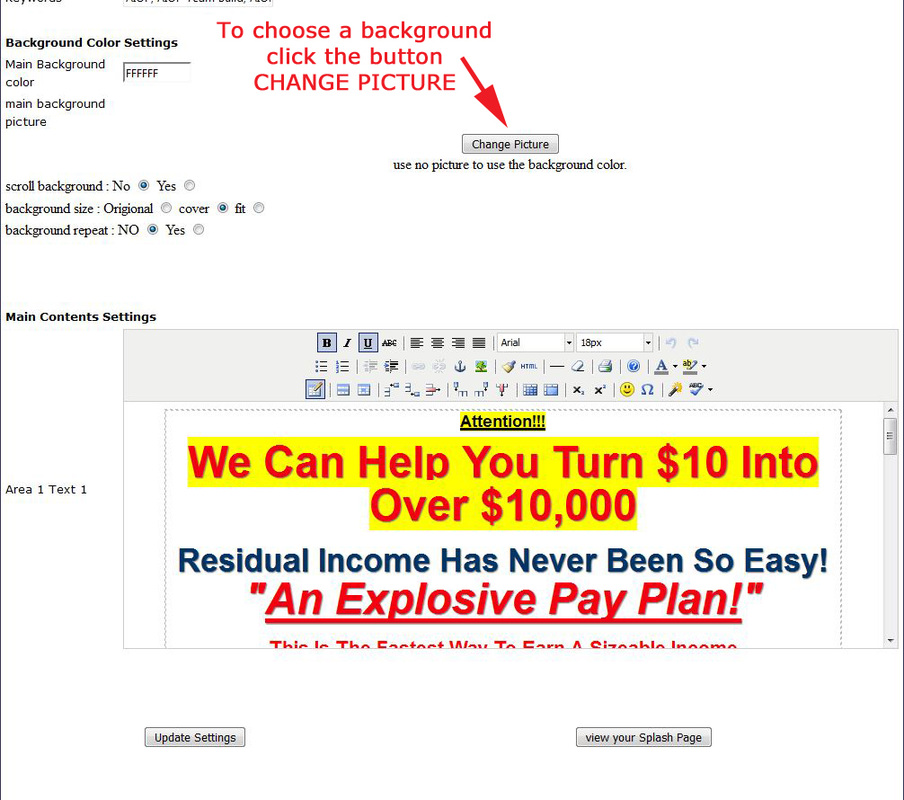
21. Almost finished!!! All that's missing is the background picture.
Close the preview of your splash page and click the button CHANGE PICTURE.
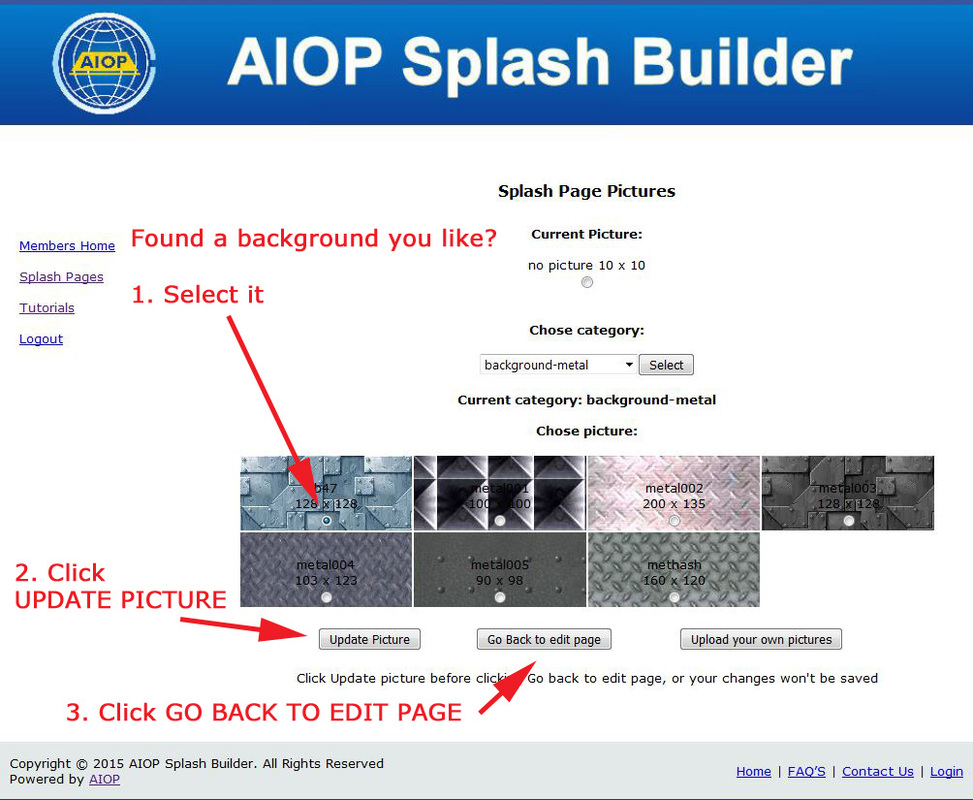
22. Now you can choose one of the preloaded background pictures. You can also upload your own pictures if you like. But for now, let's select a preloaded one.
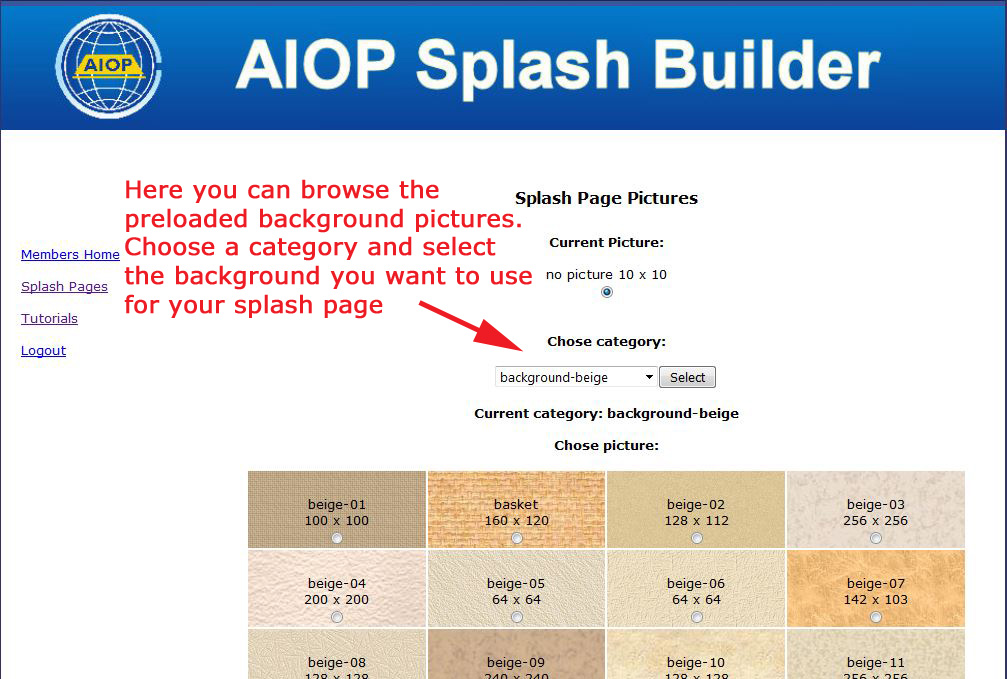
23. Select a picture you like, click the button UPDATE SETTINGS and then
click the button GO BACK TO EDIT PAGE.
24. IMPORTANT: Scroll down and click the button UPDATE SETTINGS or your settings will be lost.

25. Now click on VIEW YOUR SPLASH PAGE and it's finally there!!! CONGRATULATIONS!!!

If you go back to your AIOP backoffice main page and click the button SPLASH BUILDER and then on SPLASH PAGES you will find the link to your page.
Important: Before you promote your capture page, test it. Opt in with your own email address. You should receive an auto responder message with your referral link inside. Test the link.
If everything is ok you can start promoting your page. :-)